
Your cart is currently empty!
Basic Tabletop Light Box
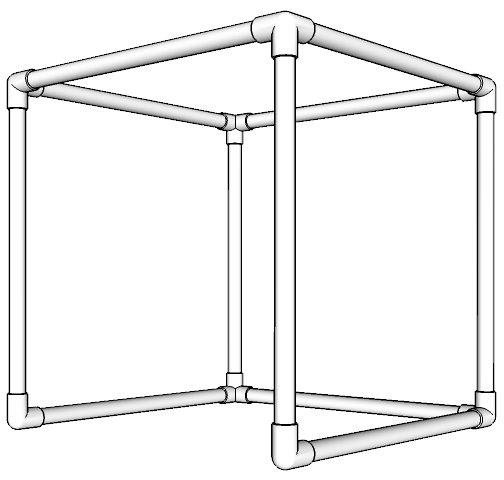
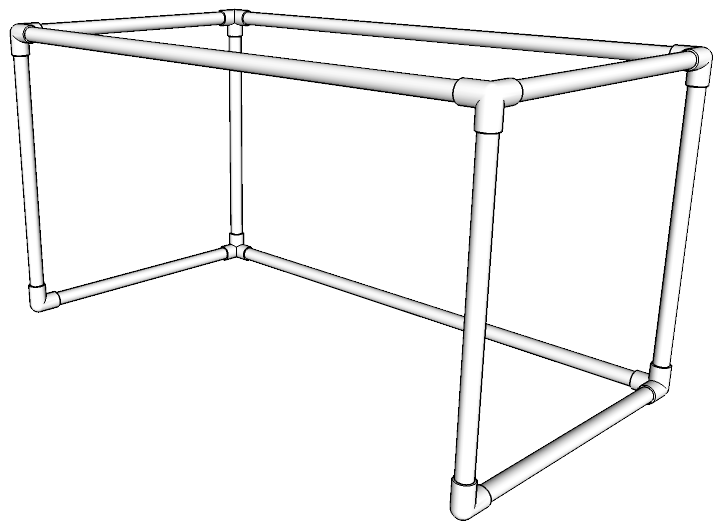
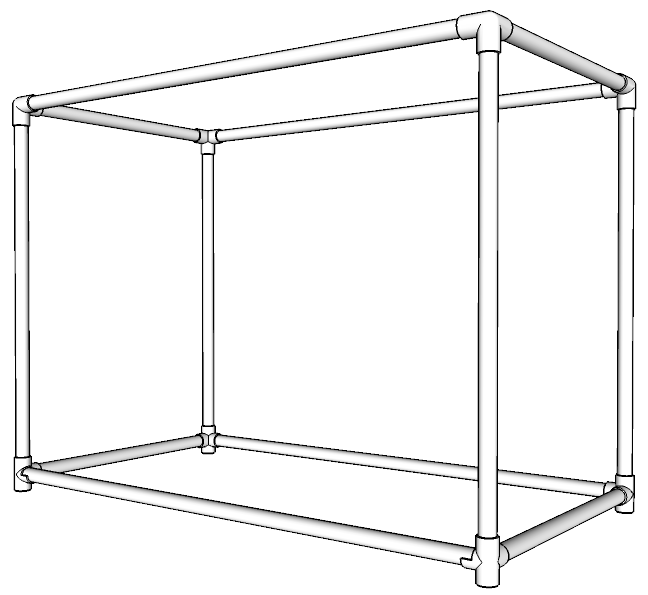
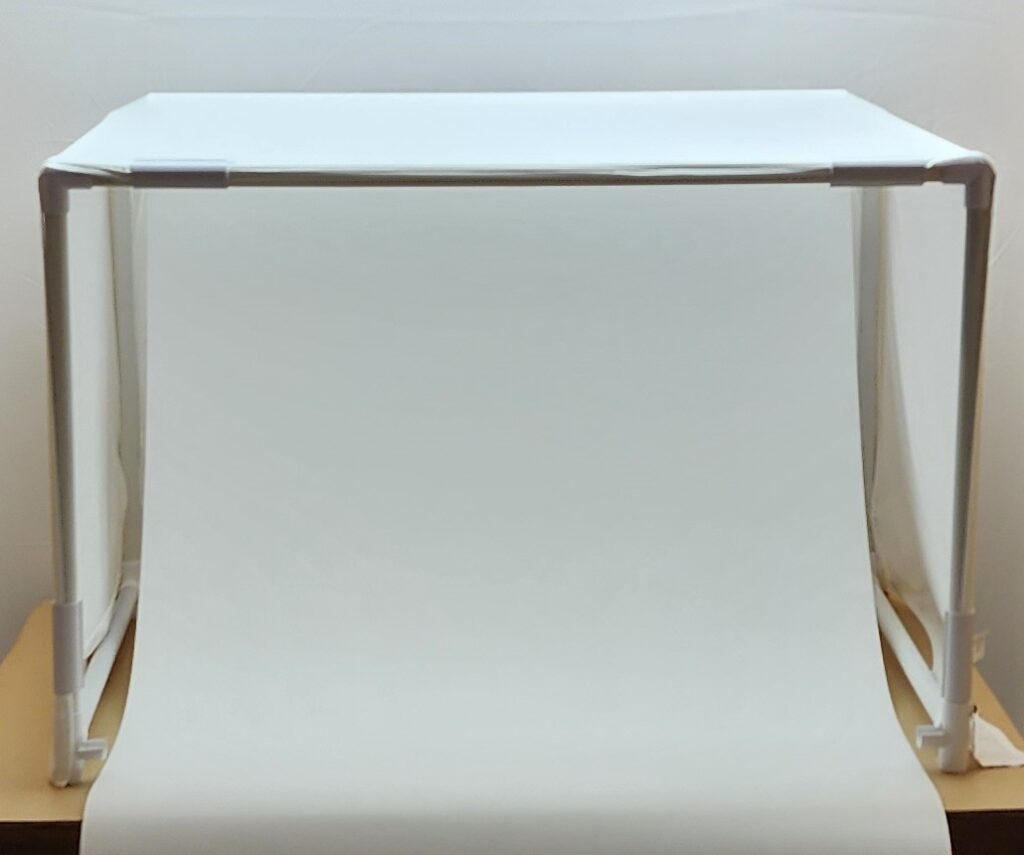
Your first design will impact how easy it will be to upgrade your studio equipment. PVC is a great building material, as it’s modular and forgiving, and you won’t need to special order expensive proprietary components to modify your light box. Simple and inexpensive, this expandable light box will be extremely useful for taking high quality photos, without taking up much space. In fact, a basic desktop or table top light box can be assembled, as needed, or disassembled and stored in very minimal space.
Click for Assembly Video, Step-by-Step Instructions, and Materials List
Making modifications becomes an easy task. For example, to widen this particular box, you will only need to exchange the three PVC pipes with whatever length you would like, to match your needs. Changing your box’s depth is just as simple, although in this particular model, it requires the four side pipes to be lengthened. Similarly, all that would be needed to increase height would be the replacement of the four vertical posts. The fittings may be kept the same, or you can change or add to your light box, as you see fit!
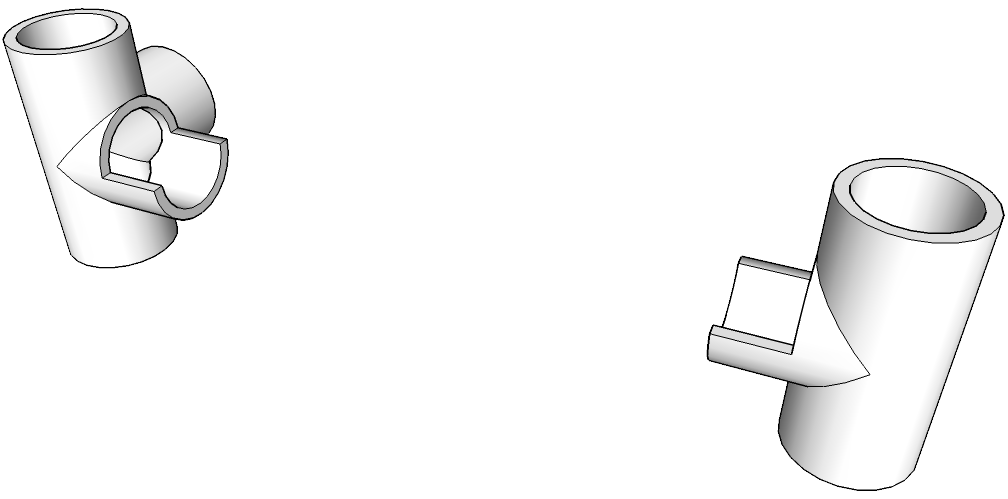
Getting used to the flow? So, the next step might be increasing the height, or not! You may also add 4 way corners to the bottom, in place of the elbows and 3 way corners, and give your box the potential for vertical modular expansion! By cutting the front left and right 4 way corners, you can now allow for an easily removable fourth cross member. Removing a little less than half of the cross member receiver allows for the crossmember to snap into place. You’ll see how that will come in handy in the next step! Here’s a close-up of those connectors:
We encourage the do-it-yourself approach. For those of you where it would be more practical, we’ll stock some modified 3/4″ connectors. There are many videos on the web demonstrating how to make a light box from cardboard, far fewer tutorials exist for PVC. I do think cardboard is a wonderful idea, as the ‘maker’ in me loves repurposing things that would normally be sent to a landfill. My very first light box was exactly that, I’d cut out the sides of a cardboard box and taped tissue paper to it. It worked pretty well, but it was definitely not viable as a long term solution. All of the materials are easily sourced on Amazon and some of the materials are even available at your local home improvement stores.
Dimensions
Approximate dimensions are: Width – 3′, Height – 2′, Depth – 2′.
It’s important to plan on making your cuts a bit larger, if you plan on adding accessories, such as 36″ paper rolls. You can always trim your pipes later. A twin sheet is the perfect size for this light box.
Using a miter box and saw will produce much straighter cuts than the PVC shears, and also makes it possible for you to cut your own custom fittings.
Materials
- The Basic Box (Example of our Basic Light Box) – DIY Cost: Around $50
- White twin flat sheet for diffuser – $6
- 36″ by 100′ roll of white paper – $32 (OPTIONAL)
- 30″ by 20″ sheet of poster board – $.50 (Dollar Tree!)
- Acrylic sheet 30″x40″x1/4″ – OPTIONAL – Plan on $100, or more
- Laminated board from Home Depot (OPTIONAL) – ten bucks
- Light source – converted LED TV – FREE! Many inexpensive lighting options may be found with a bit of searching. Check our video links for free tutorials
Directions
- Cut 3/4″ PVC to length:
- 4 pieces at 37 5/8″
- 4 pieces at 24 1/2″
- 4 pieces at 22 15/16″
- Modify four 3/4″ PVC 4 way corner fittings, as shown on our products pages. Two 4 Way Connector Saddle – RIGHT and two 4 Way Connector Saddle – LEFT. The saddles should be cut approximately 1/16″ above center, to allow for the rails to be able to ‘snap’ into place.
- Assemble – Connect two 4 way corner connectors to the ends of one 37 5/8″ piece (this will be the back) and two modified 4 way corners to another 37 5/8″ pipe (this is the front).
- Connect the front and back rails by adding one 24 1/2″ PVC pipe to each side, inserted into the 4 way fittings.
- You should have your bottom level completed.
- For the top rails, use the four 3 way corner connectors, adding the above-mentioned pipe measurements.
- Connect the bottom level to the top with the four 22 15/16″ pipes as vertical risers, these are the vertical corner posts of the box.
- Cover with the sheet, as shown above and use the ABS Snap Clamps to secure it. Stretching the sheet tight gives a nice aesthetic look (but doesn’t significantly change the light diffusion.
- There is no need to use glue for this build. The stretched flat sheet keeps everything in place!